
Arduino Web Server Html Files Sd Card UnBrick.ID
Arduino Web Server with Webpage Stored on SD Card - YouTube 0:00 / 6:01 Arduino Web Server with Webpage Stored on SD Card Anas Kuzechie 10.8K subscribers Subscribe 9.9K views 1 year ago.
Arduino web server YouTube
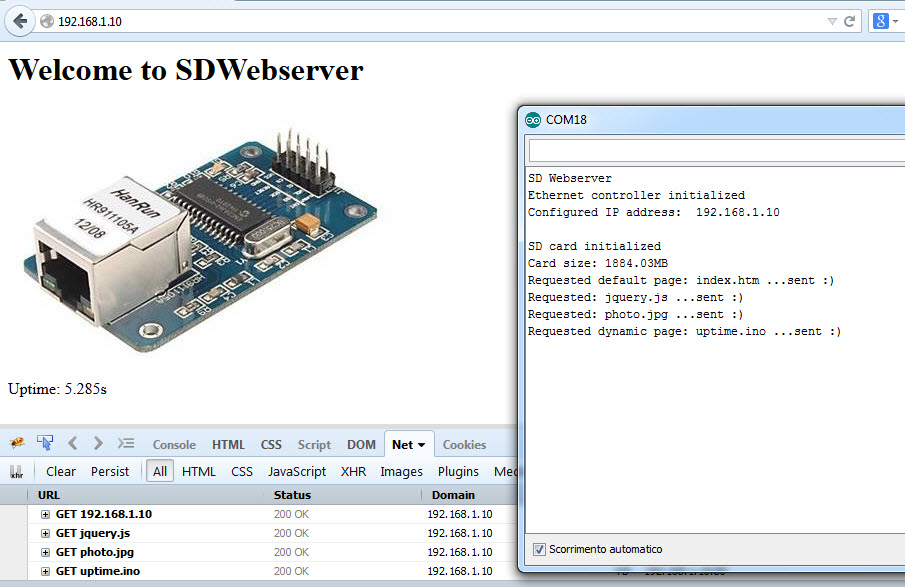
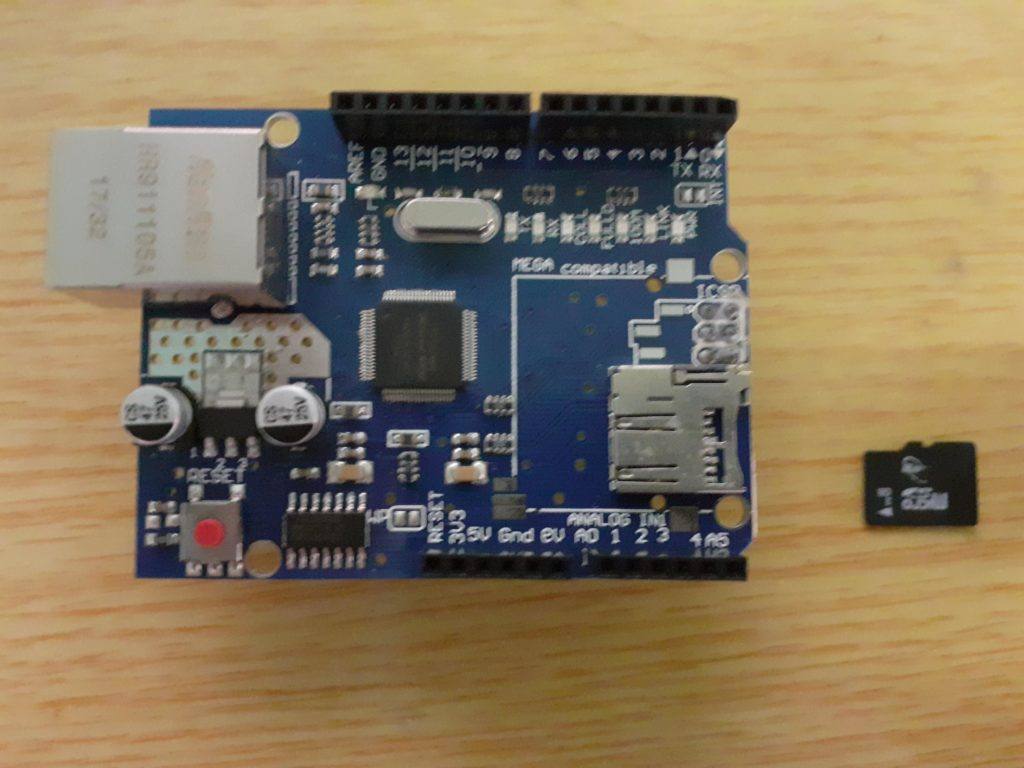
The Arduino, Arduino Ethernet shield and micro SD card are used to make a web server that hosts a web page on the SD card. When a browser requests a web page from the Arduino web server, the Arduino will fetch the web page from the SD card. Creating the Web Page
Arduino Web Server Html Files Sd Card UnBrick.ID
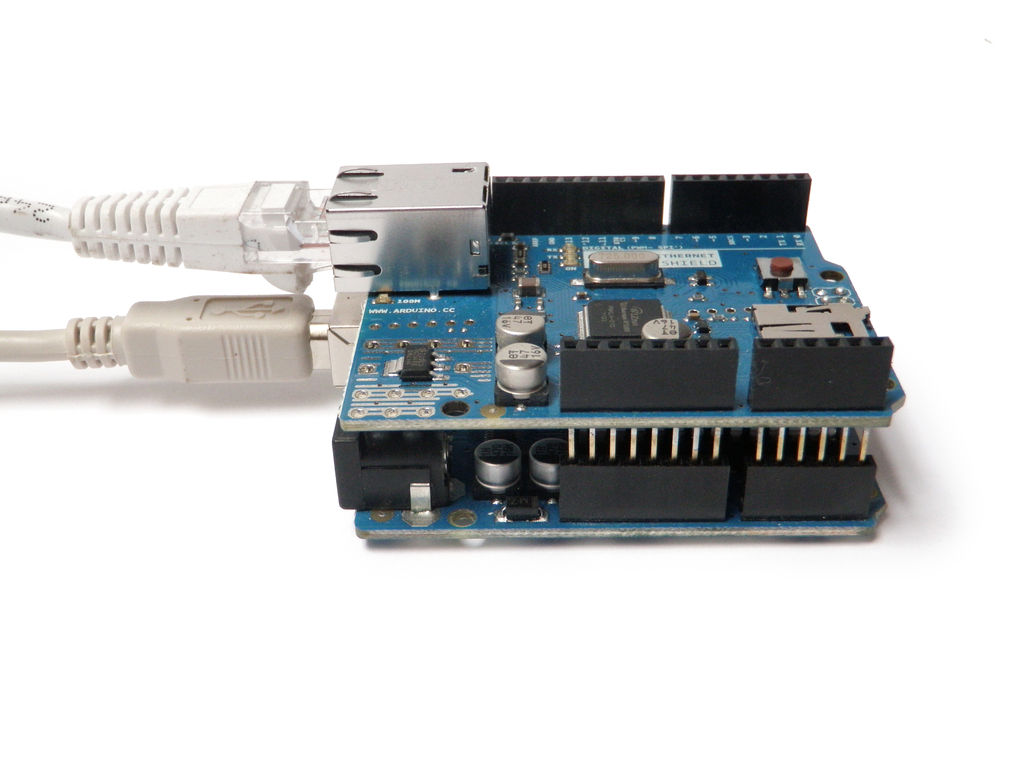
. For more circuit examples, see the In the above image, the Arduino board would be stacked below the Ethernet shield. The schematic for this tutorial. This example doesn't require an SD card.

Arduino Web Server using ESP8266 / ESP32 ElectronicDIYs
Async Web Server for ESP8266 and ESP32 A fork of the ESPAsyncWebServer library maintained by ESPHome Author: lacamera. Maintainer: lacamera. Read the documentation. To use this library, open the Library Manager in the Arduino IDE and install it from there. 3.1.0.
Arduino Web Server Html Files Sd Card UnBrick.ID
An Arduino and Ethernet shield are used as an Arduino web server data logger that periodically logs data to a file on the SD card. The logged data can be viewed on a web page. In the Arduino sketch for this project, the value from analog input A5 is logged to file together with the time in milliseconds from the millis () function.
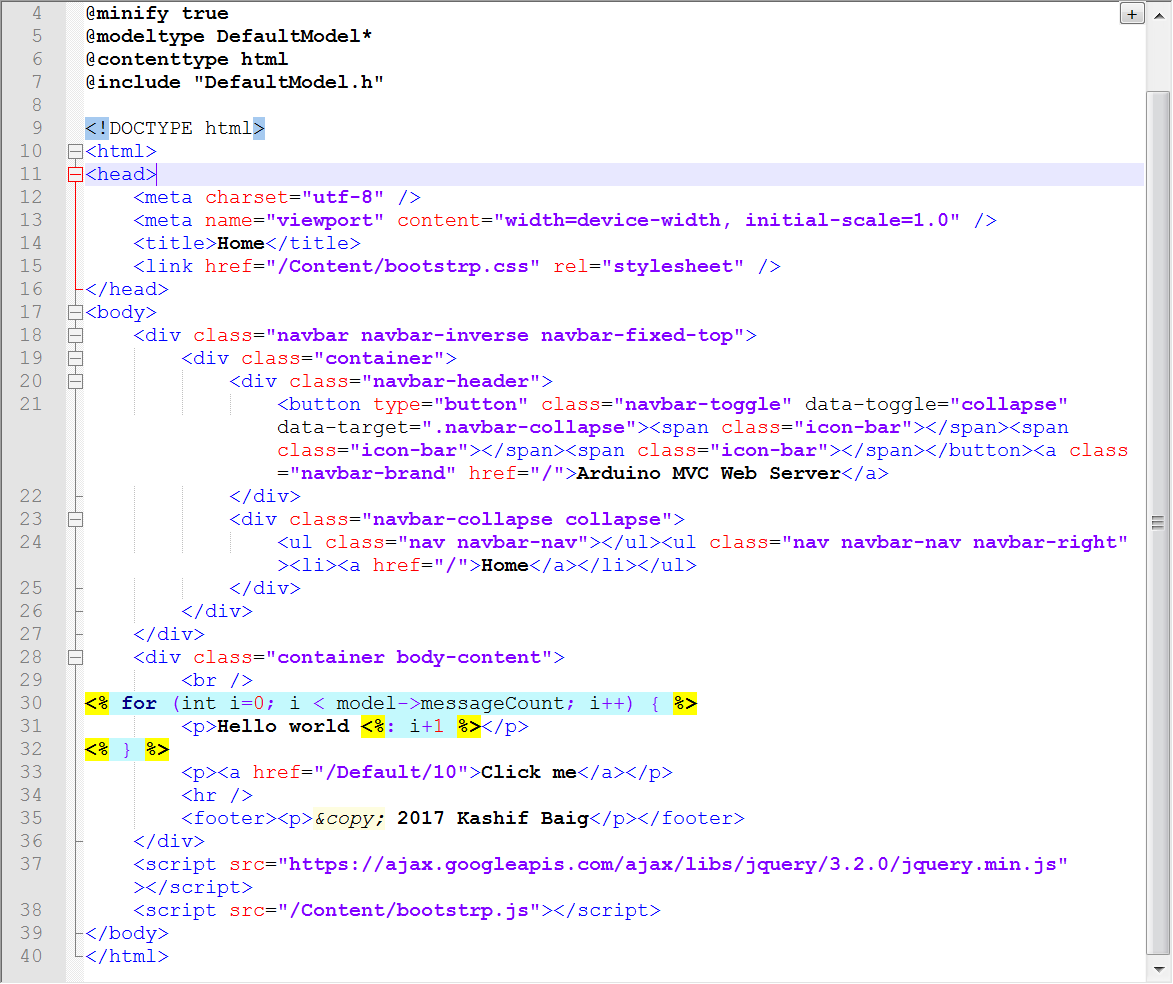
Arduino Web Server Develop IoT Web Apps Using MVC Design
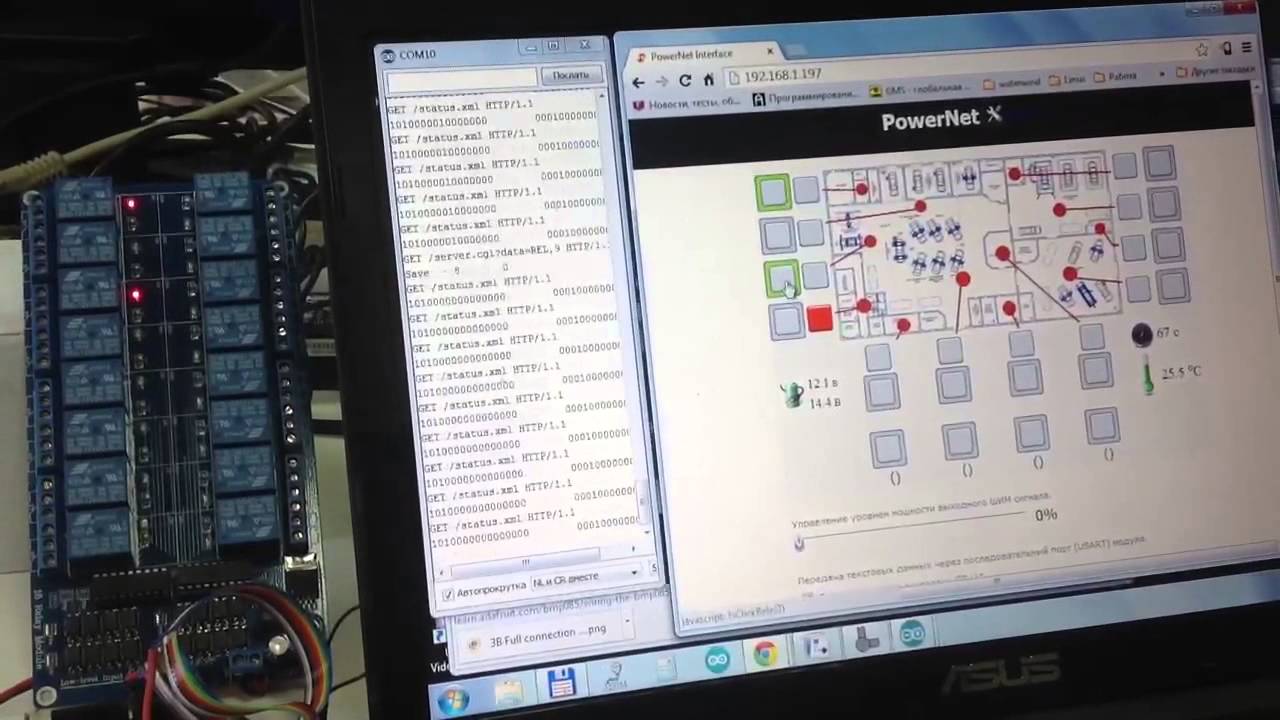
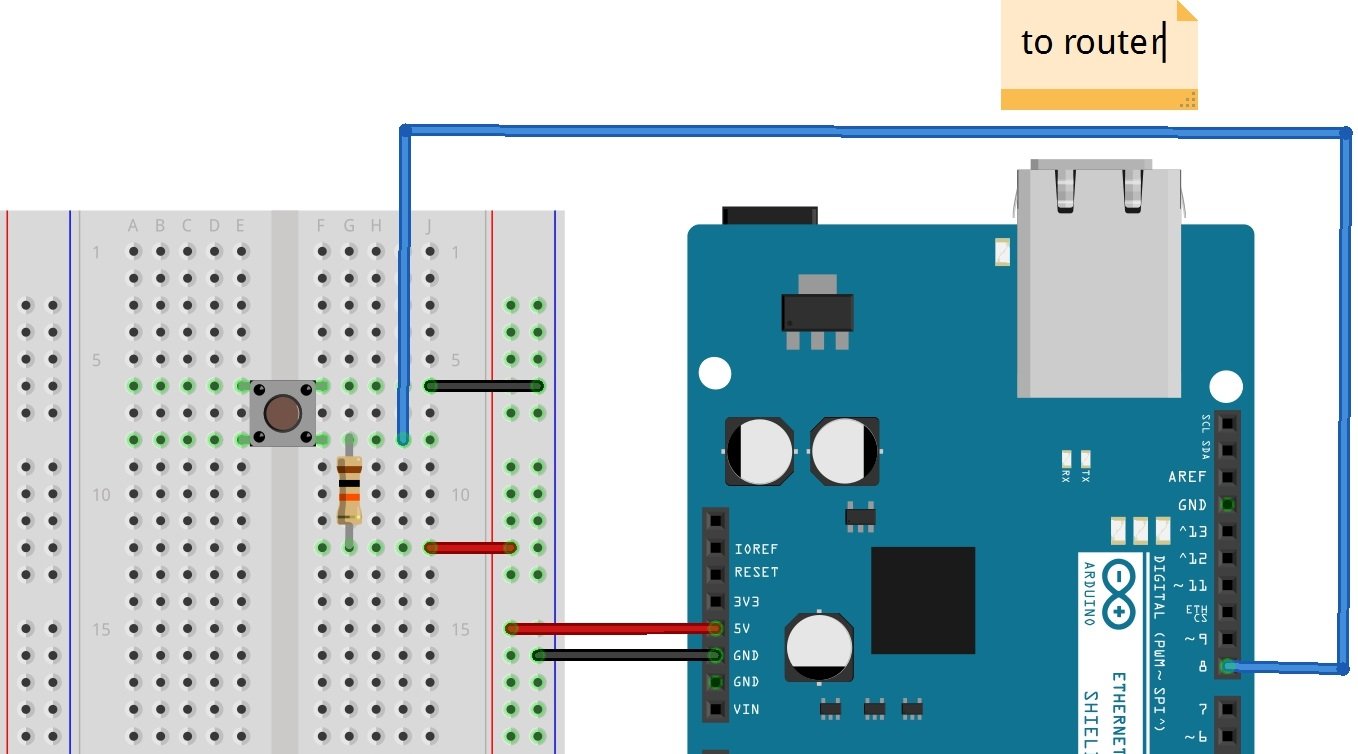
Connect the components as shown above. Arduino's pin 8 is connected to the pushbutton and is configured as INPUT. When the button is pushed, the Arduino will read a LOW value on this pin. The Arduino will then set the status of the OUTPUT to ON. When it is released, the output will be set to OFF. The status of the switch will be sent to the Web.

Arduino NodeMCU ESP8266 Local Web Server LED Control with Simple
Equipment The equipment that you will need for this Arduino web server tutorial is listed below. Recommended Arduino Uno Ethernet Shield or similar Ethernet Cable Micro SD Card (Optional) ** The SD card will need to be formatted in either FAT16 or FAT32. Code Basics

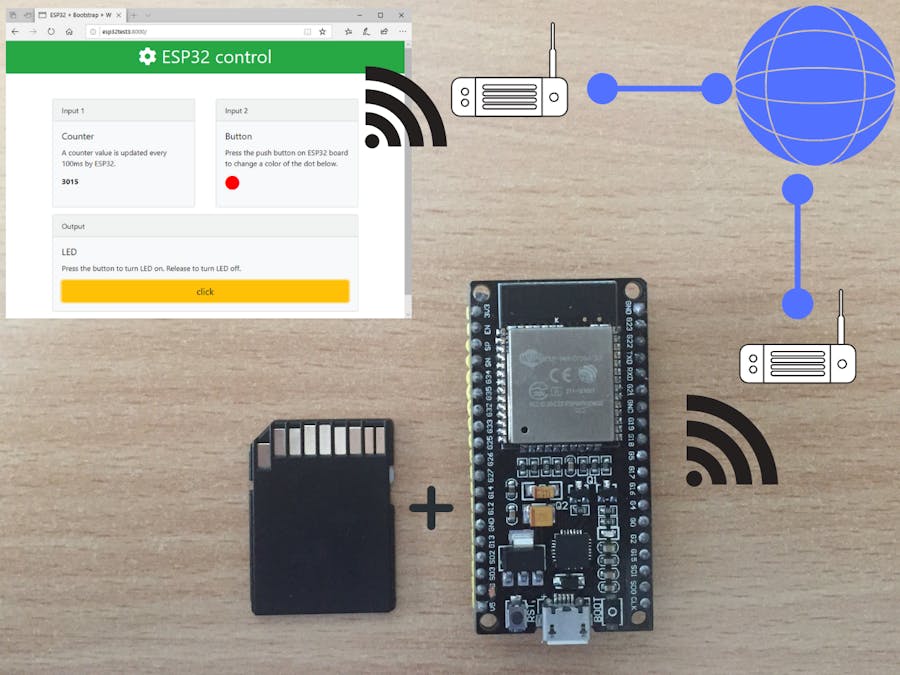
ESP32 DHT11/DHT22 Web Server using Arduino IDE Random Nerd Tutorials
ESP web serve a SD Image. Using Arduino. Pauzed January 8, 2024, 3:36am 1. Hi, I'm attempting to serve an image from sd card via the server. It is ammended from CarmeraWebServer project example. String read_file (const char * path) { String s = ""; Serial.printf ("Reading file: %s\n", path); fs::FS fs = SD_MMC; File file = fs.open (path, FILE.

Demo 17 Arduino ESP32/ESP8266 WebGPIO control GPIO from web
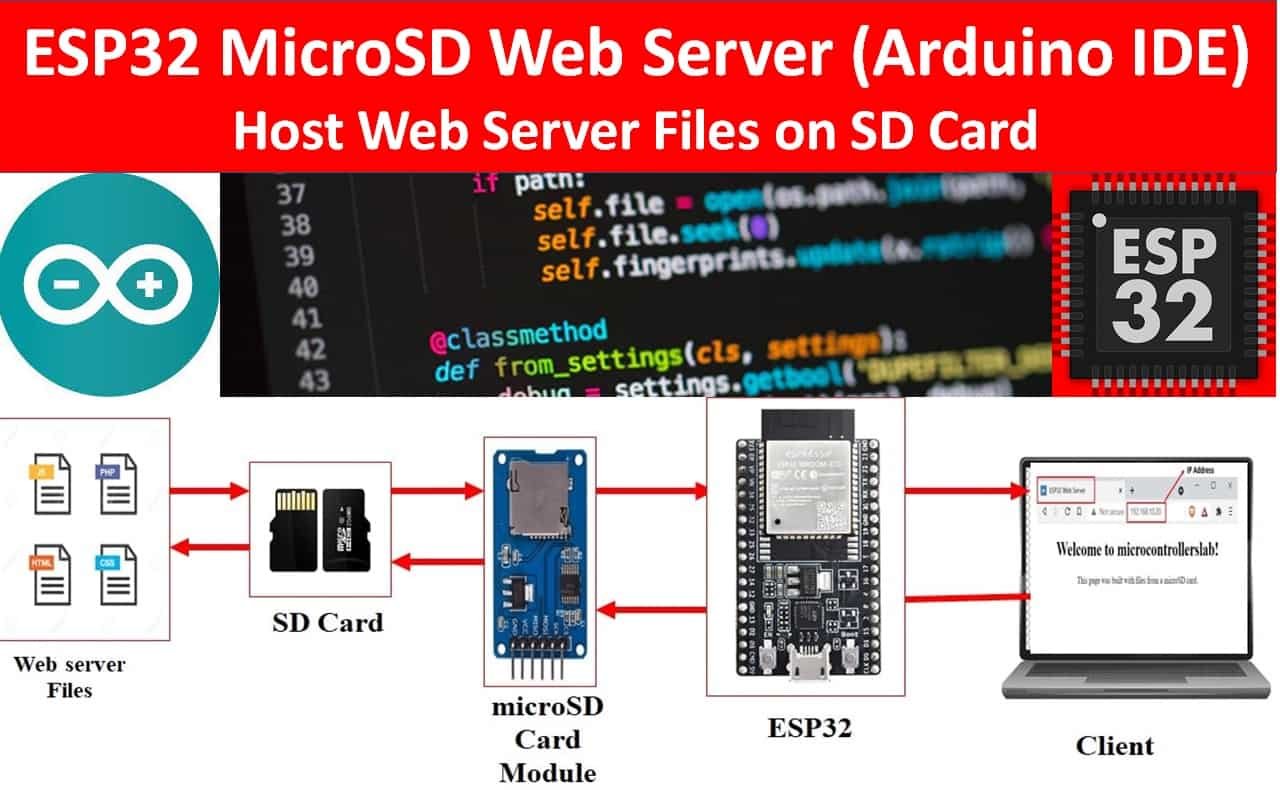
ESP32 Asynchronous Web Server using Arduino IDE and ESPAsyncWebServer library. MicroSD Card Module Introduction. The microSD card Modules are designed to communicate with the MicroSD cards. These connectors provide the required hardware and pinout to connect SD cards with microcontrollers such as ESP32, Arduino, ESP8266, Raspberry Pi, etc.
Arduino Web Server Part 2 Maker and IOT Ideas
Step 1: What You Will Need For this project, you need only 2 things minimum to make it work. Everything else is extras that you can include if you want to. The Required Parts are: An Arduino An Arduino Ethernet Shield - Note: If you have an older shield, you will not be able to use an SD card with it.
Using Arduino as a simple Web Server along with shield
Uploading the ESP8266 code. Having the ESP8266 add-on for the Arduino IDE installed ( How to Install the ESP8266 Board in Arduino IDE ), go to Tools and select " Generic ESP8266 Module ". Copy the sketch below to your Arduino IDE. Replace the SSID and password with your own network credentials. After modifying the sketch upload it to your.
Microcontrollers tutorials and projects
A page hosted by the Arduino web server on the SD card contains an image. This tutorial shows how to insert a JPEG image into a HTML web page and how to send the image to the web browser when an HTTP request for the image is received by the web server. Uses the Arduino Uno with Ethernet shield and micro SD card.
Gallery Arduino Web Server Hackaday.io
Arduino - Web Server In this tutorial, we will learn how to turn an Arduino Uno R4 WiFi into a web server. By accessing the web pages hosted on the Arduino Web Server through a web browser on your PC or smartphone, you'll be able to read values from the Arduino and even control it.

Arduino Web Server 4 Steps
Circuit The Ethernet shield allows you to connect a WIZNet Ethernet controller to the Arduino boards via the SPI bus. It uses the ICSP header pins and pin 10 as chip select for the SPI connection to the Ethernet controller chip. Later models of the Ethernet shield also have an SD Card on board.
Arduino Web Server Tutorial Pdf sewnbysamdesigns
Created on: 5 April 2013 Part 16 of the Arduino Ethernet Shield Web Server Tutorial In this part of the tutorial, everything covered so far comes together. HTML, JavaScript, CSS, HTTP, Ajax and the SD card are used to make a web page that displays Arduino analog and digital inputs and allows digital outputs to be controlled.
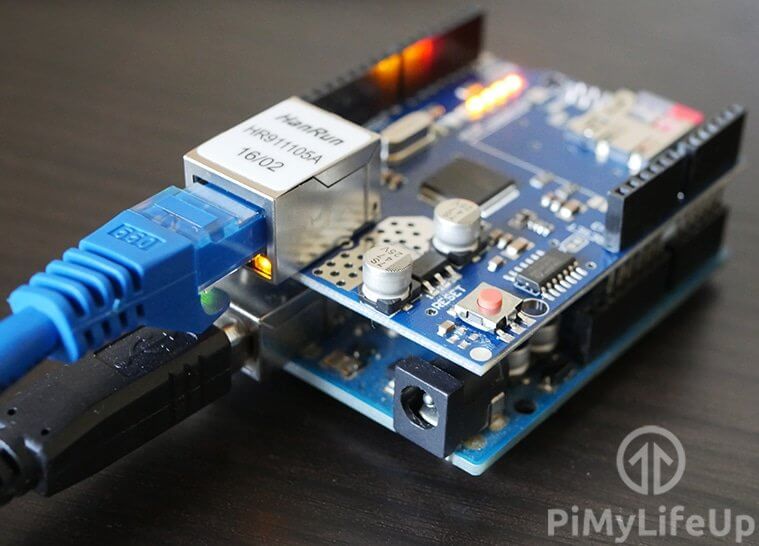
Basic Arduino Web Server Pi My Life Up
Find code and diagrams at: https://www.EliTheComputerGuy.comUsing an Ethernet Shield you can run a simple web server from an Arduino.Note: The Micro SD card.
